
Product Help
SAML SSO with Microsoft
Single Sign On (SSO) allows users to log into many applications or websites using an identity provider. Security Assertion Markup Language (SAML) is a security standard for managing authentication and access.
In a SAML SSO set up, the identity provider manages the organisation's user accounts and credentials. The service provider (Landchecker) is the app or website that provides services to the user or organisation.
When using SAML SSO, members log in to their Landchecker organisation using the organisation's identity provider.
How SAML SSO works:
Member attempts to log in to Landchecker via SAML SSO
Landchecker sends a SAML request to the identity provider
The identity provider checks this member's credentials
The identity provider sends a response to Landchecker to verify the member's identity
Landchecker accepts the response and logs the member into their Landchecker account
Set up SAML SSO
The process for configuring SAML will depend on your specific identity provider. We've outlined the general process for implementing SAML SSO below.
SAML SSO only applies to members of a Landchecker organization. Guests can log in via Microsoft SSO or their email and password, regardless of an organisation's SAML SSO settings.
1. Add Landchecker to your identity provider
When you add Landchecker to your identity provider, they will provide you with a Metadata URL or XML file. This is an XML link that Landchecker uses to connect to your identity provider and authenticate users when they login.
1.1 Click the Business Account Setting link from the profile menu.
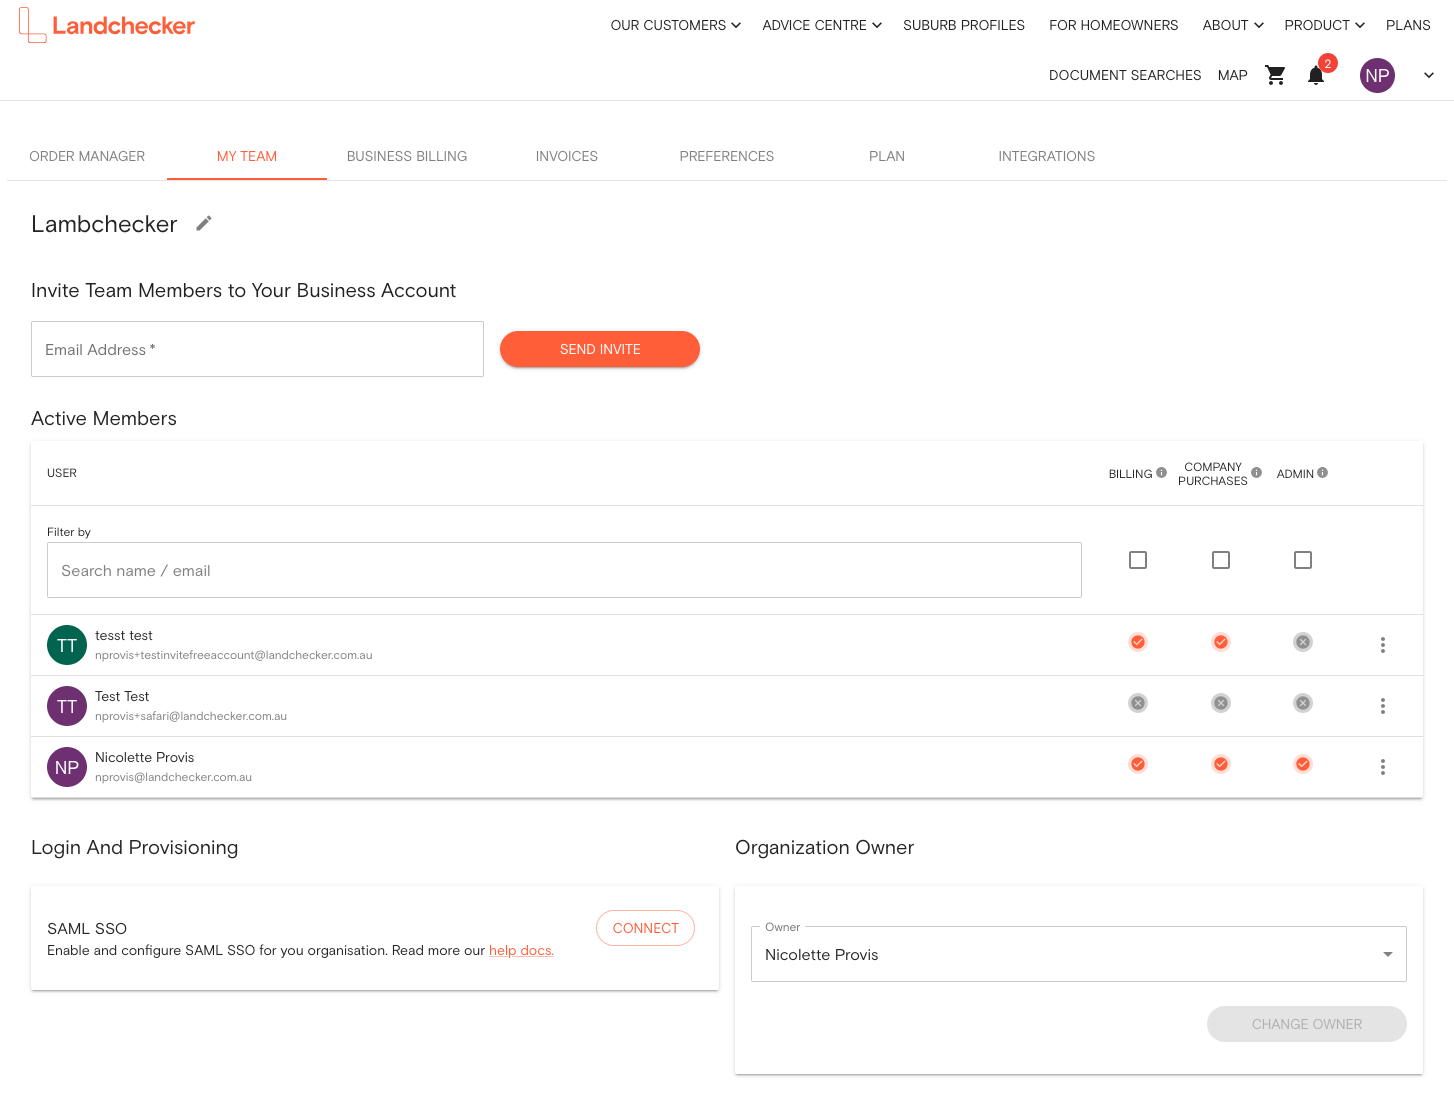
1.2 Head over to the MY TEAM page and scroll down to the Login and Provisioning section. Click the CONNECT SAML SSO button.
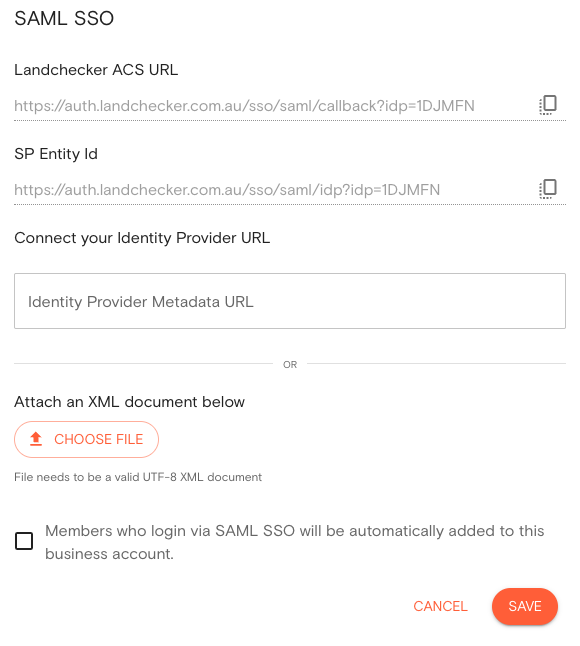
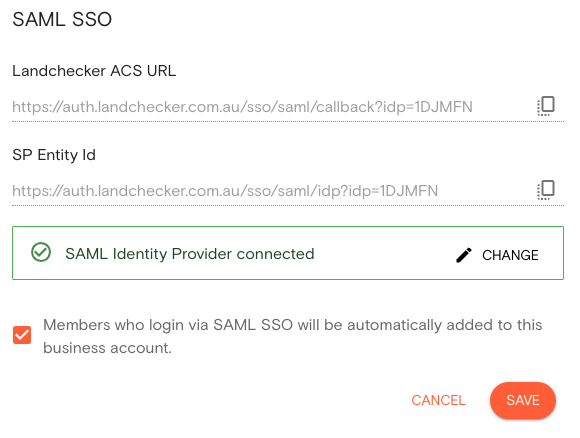
1.3 Copy the Landchecker ACS URL and the SP Entity ID these will be used when configuring the new SAML application in Entra ID (keep this page open for step 4)
2. Add Landchecker to Entra ID
2.1. Open Entra ID in the overview page
2.2. Select Enterprise applications
2.3. Click New application to browse Entra ID Gallery
2.4. Click Create your own application
2.5. Type Landchecker as the name of the new application
2.6. Select 'Integrate any other application you don't find in the gallery'
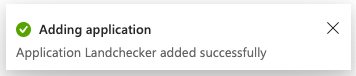
2.7. Click Create
2.7. Entra ID will show a success message and redirect you to the Landchecker application overview
3. Configure SAML in Entra ID
We recommend having both Landchecker and Entra ID open in separate tabs. This allows you to switch between them throughout the setup process.
3.1. Select 'Set up single sign-on' in panel
3.2. Select SAML from options
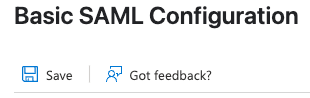
3.3. Under Basic SAML Configuration, click Edit to make changes
3.4. Under Identifier (Identity ID), click Add identifier
3.5. Paste the SP Entity ID you copied from Landchecker earlier in the field provided
3.6. Under Reply URL (ACS link), click Add reply URL
3.7. Paste the Landchecker ACS URL in the field
3.9. Click Save at the top of the screen:
3.10. Under Attributes & Claims, click Edit to make changes
3.11. Remove all namespaces from Additional Claim mappings.
3.12. Map the following Claim names to the following values:
EmailAddress -> user.mail
FirstName -> user.givenname
LastName -> user.surname
(user.userprincipalname is not required as an Additional Claim and can be removed)
3.13. Close the Attributes & Claims menu
3.14. Scroll down to the SAML Signing Certificate section and copy the App Federation Metadata URL
4. Turn on SAML SSO in Landchecker
Next, you'll need to set up SAML SSO in Landchecker. This will:
Turn on SAML SSO for your organisation
Connect your identity provider to your Landchecker account
4.1. Head back to the MY TEAM page you have open
4.2. Paste the copied App Federation Metadata Url into the Identity Provider Metadata URL
4.3. Check whether you want members who sign up via SAML to be automatically added to your Business Account.
4.4. Click SAVE
5. Assign Users and Groups
Assign a test user to Landchecker in Entra ID. This allows you to complete the SAML setup process and test the application.
5.1. Select Assign users and groups from the options.
5.2. Click + Add user/group to open the assignments page.
5.3. Click Users and groups, click None selected.
5.4. Search for test user. We recommend using your own account so that you can test the login at the end of the setup process.
5.5. Click to add and return to the assignments page.
5.6. Click Assign button to return to application page.
6. Let your users know about the change
To make sure users don't mistake the email for spam or a phishing attempt, you may wish to let them know about this extra step in advance.