Product Help
How to use the project sharing function
Landchecker makes it easier for you to manage and share your portfolio with your team through the Projects tool. Here's how to share a project from the left-hand side panel of your screen under the layers menu.
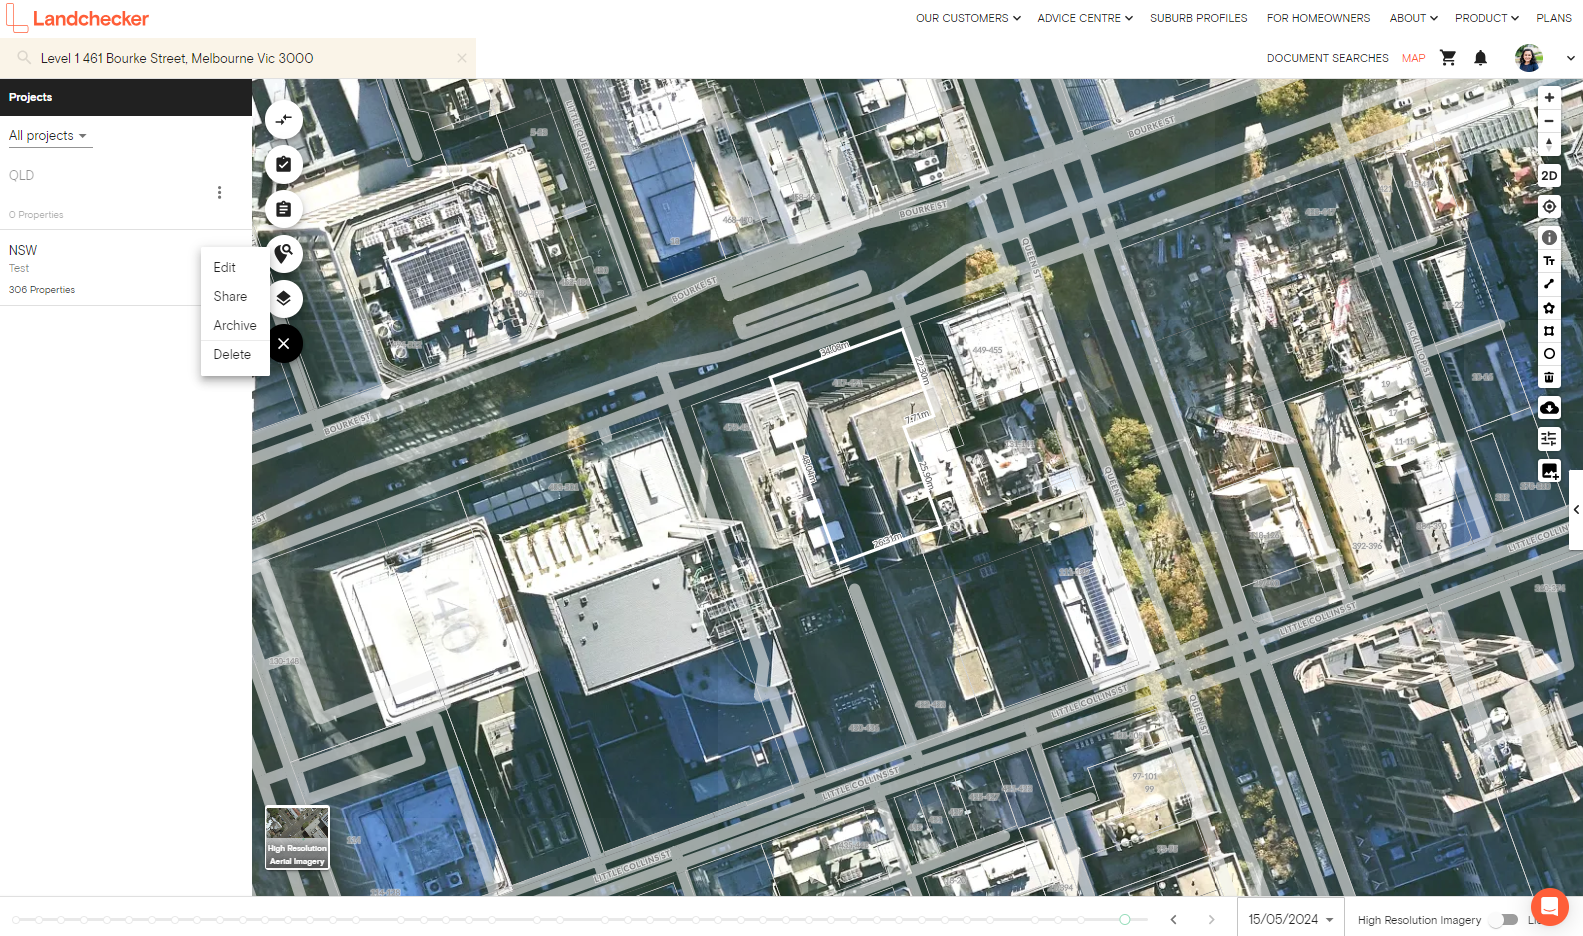
1. Select projects
Click on the projects icon, which is located on the left side of your screen in the layers panel, down the bottom of the menu.

2. View existing projects
All your existing projects will pop up inside the layers panel.
3. Select share
Choose a project to share, click on the kebab icon (vertical three dots) and you will be presented with the option to “edit”, “share”, “archive” or “delete” your project. Select “share”
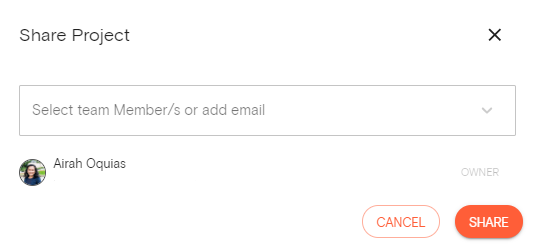
4. Edit share options
You will be directed to a new popup dialogue, titled “Share Project”. From here, select your team member(s) or add email address of team member(s) as instructed. You can also remove members you no longer want to share with.
5. Save share edits
Simply click “share” to save all edits made.