Product Help
How to use the drawing tools
Use the drawing tools to measure and annotate a property or lot area right from your desktop. The following options are available in the right-hand side Toolbar of the map:
Any shape tool - used to measure irregularly shaped objects with multiple points
Rectangle tool - used to measure regularly shaped objects like pools or draw perfect right-angle shapes
Circle tool - used to measure the area, radius and diameter of a property
Distance tool - used to measure the length of a property or land area
Text label tool - used to add annotations or labels on a property
This feature is available for members under the Standard, Advanced and Enterprise plans, with Advanced and Enterprise plans having access to advanced features including the ability to edit the colour and more.
Sign up today to access Drawing Tools
Drawing tools are available on Standard and Advanced plans. Standard giving you access to standard functionality and Advanced to advanced functionality.
Watch the videos or read the steps below to learn how to use the drawing tools on Landchecker.
NOTE: The left-hand side Tools panel will initially display “No Tools Found” when you first select one of the tools and enter into Draw Mode, but once you finish drawing your shapes or adding text labels, they will be automatically saved there.
Drawing a Polygon
1. Search a property address on the map using the search bar
2. Select the Any Shape tool in the right-hand side Toolbar
3. Draw out the area by clicking along the outside boundary of the property
4. Double-click the last vertex or point to save the polygon
5. Show or hide the area and line length measurements in the left-hand side Tools panel
6. Select 'Export Current Map View' in the right-side Toolbar to save your measurements and annotations. The .png file will automatically download on your device.
7. Click the Delete button in the Toolbar if you want to remove a shape
Note: The shape must be selected in order to delete.
Drawing a Rectangle
1. Search a property address on the map using the search bar
2. Select the Rectangle Tool on the right-hand side Toolbar
3. Start by drawing either one of the width or length of the rectangle and drag your mouse to the other side to complete the shape
4. Show or hide the area and line length measurements via the left-hand side Tools panel
5. Select 'Export Current Map View' in the right-hand side Toolbar to save your measurements and annotations. The .png file will automatically download on your device.
6. Click the delete button in the Toolbar if you want to remove a shape
Note: The shape must be selected in order to delete.
Drawing a Circle
1. Search a property address on the map using the search bar
2. Select the Circle Tool on the right-hand side Toolbar
3. Click and drag to draw the circle on the map
4. Click and drag on any point as needed if you want to adjust the size of the circle
5. Show or hide the area, radius and diameter measurements via the left-hand side Tools panel
6. Select 'Export Current Map View' in the right-hand side Toolbar to save your measurements and annotations. The .png file will automatically download on your device.
7. Click the delete button in the Toolbar if you want to remove the shape
Note: The shape must be selected in order to delete.
Drawing a Line or Multi-Path Lines
1. Search for a property on the address search box
2. Select the Distance Tool on the right-hand side Toolbar
3. Click the first point to start drawing your measurements
4. Double-click the second point to end the selection if you only need to draw a single line
5. Click each point of each line segment on the map if you want to draw a multi-path line
6. Show or hide the total or line length measurements via the left-hand side Tools panel
7. Select 'Export Current Map View' in the right-hand side Toolbar to save your measurements and annotations. The .png file will automatically download on your device.
8. Click the Delete button in the Toolbar if you want to remove the shape
Note: The line must be selected in order to delete.
Adding a Text Label
1. Search a property address on the map using the search bar
2. Select the Text Label Tool on the right-hand side Toolbar
3. Type in the words you want to add in the text box
4. Click 'Add to Map'
5. Click and drag the text to move it around the map
6. Select 'Export Current Map View' in the right-hand side Toolbar to save your measurements and annotations. The .png file will automatically download on your device.
7. Click the Delete button in the Toolbar if you want to remove the text
Note: The text must be selected in order to delete.
How to Change a Tool’s Colour and Opacity
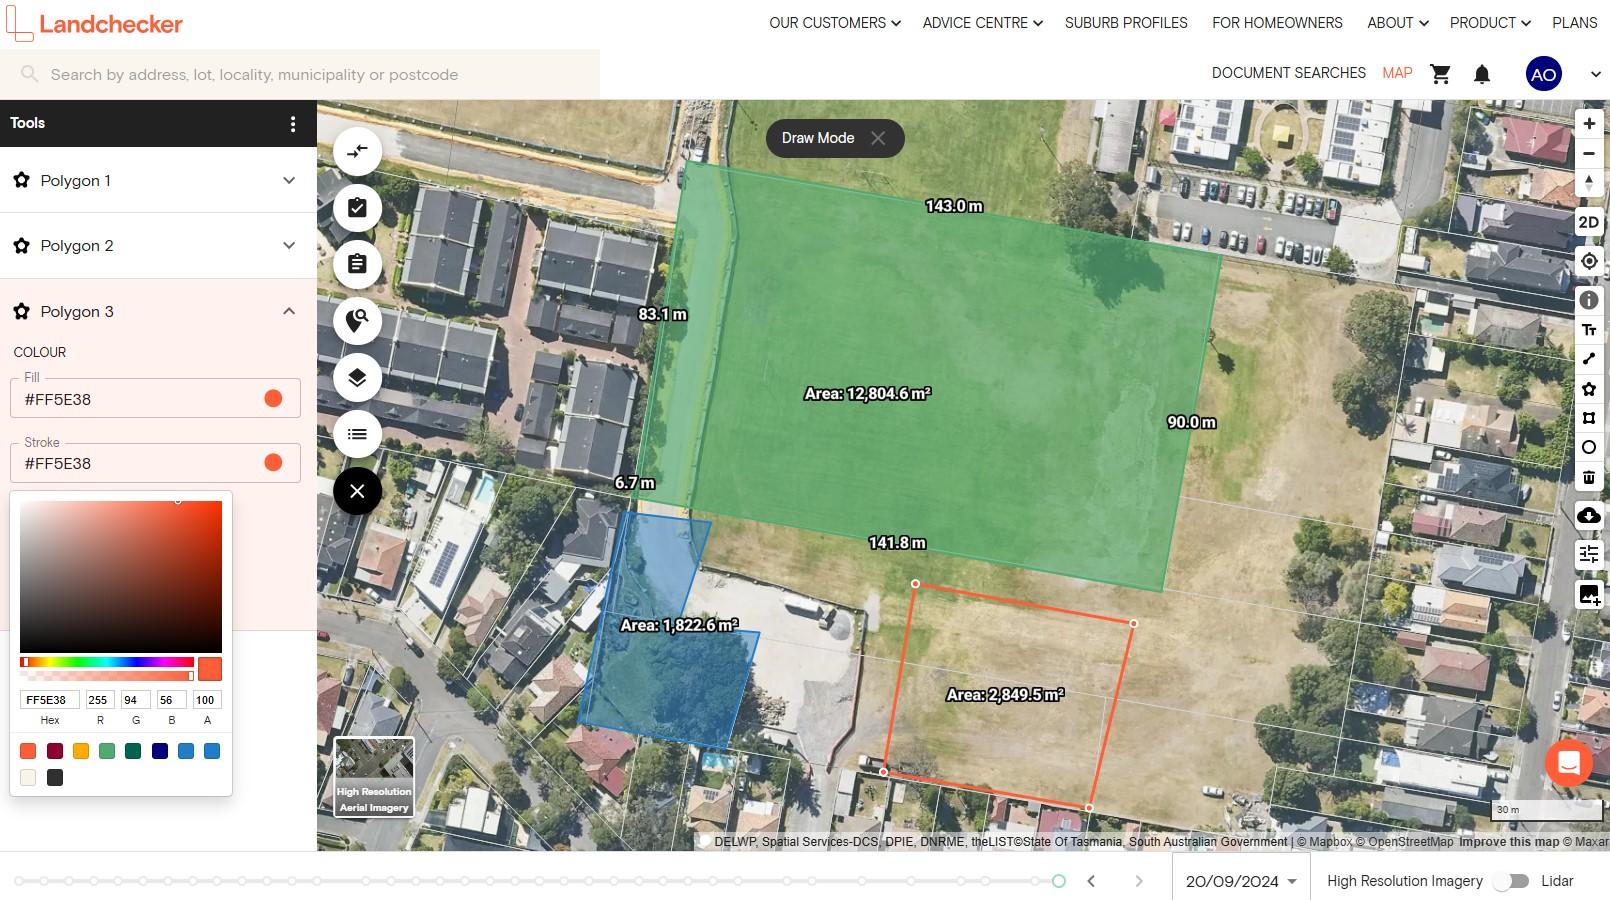
Customers on the Advanced or Enterprise plan can change the colour and opacity of a shape or text label in the Tools panel on the left-hand side.
There are three ways to select a colour:
1. Choose a custom shade from the gradient tool
2. Manually enter the hex code
3. Select one of the standard colours
The opacity can be set to zero to remove the fill colour, leaving only the stroke or outline as seen on the sample photo below.
How to Show/Hide Tools
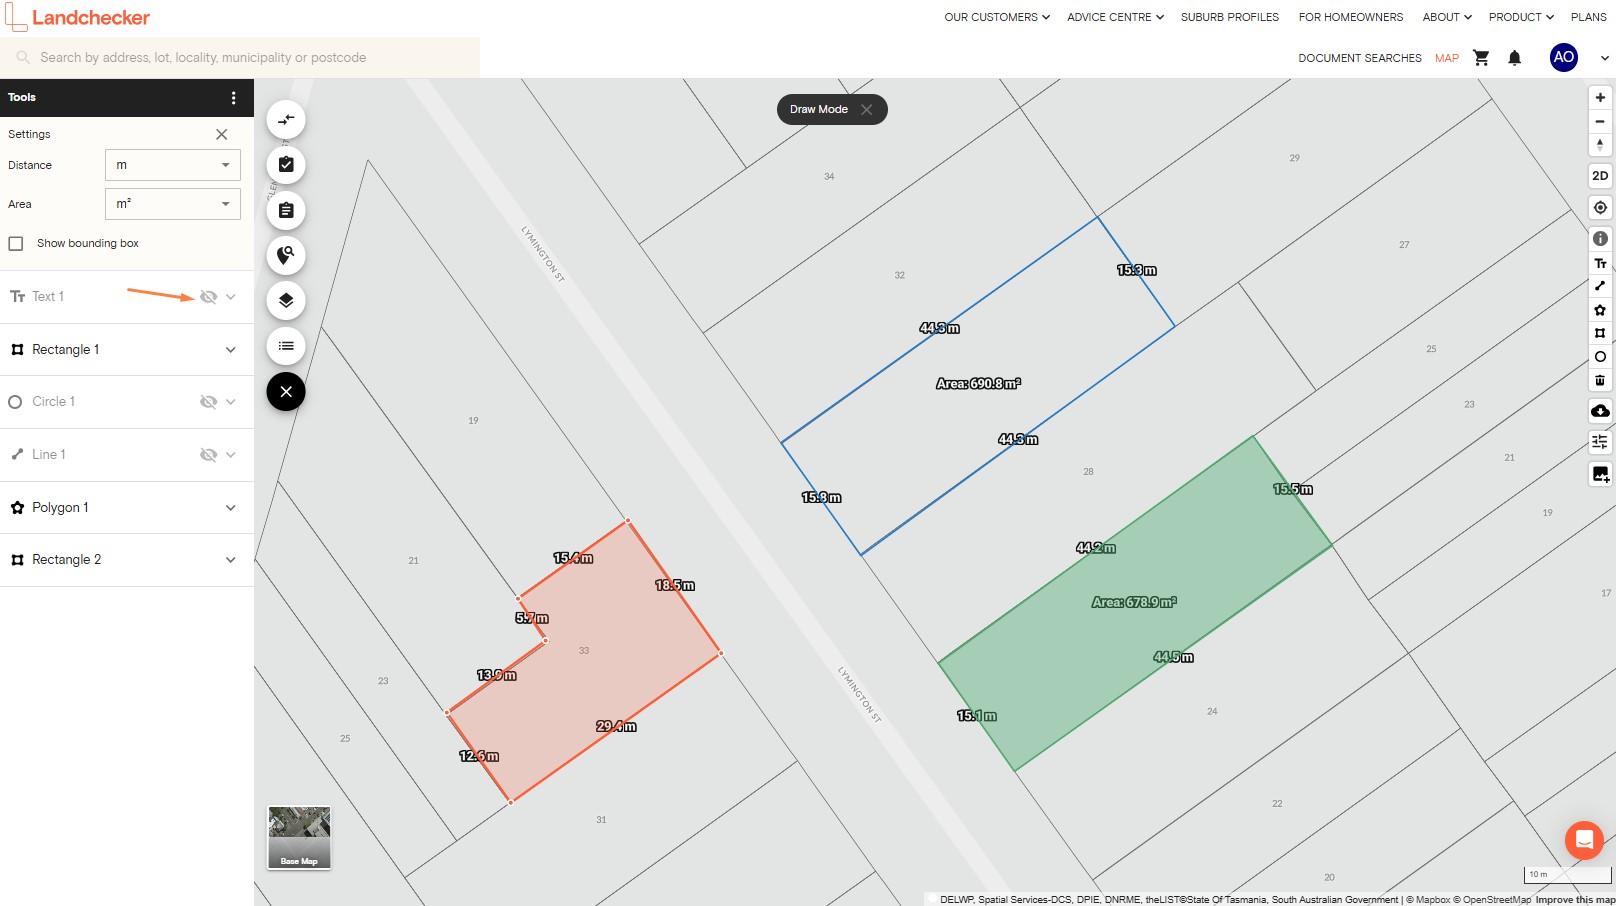
Show or hide a shape you have drawn on the map using any of the methods below.
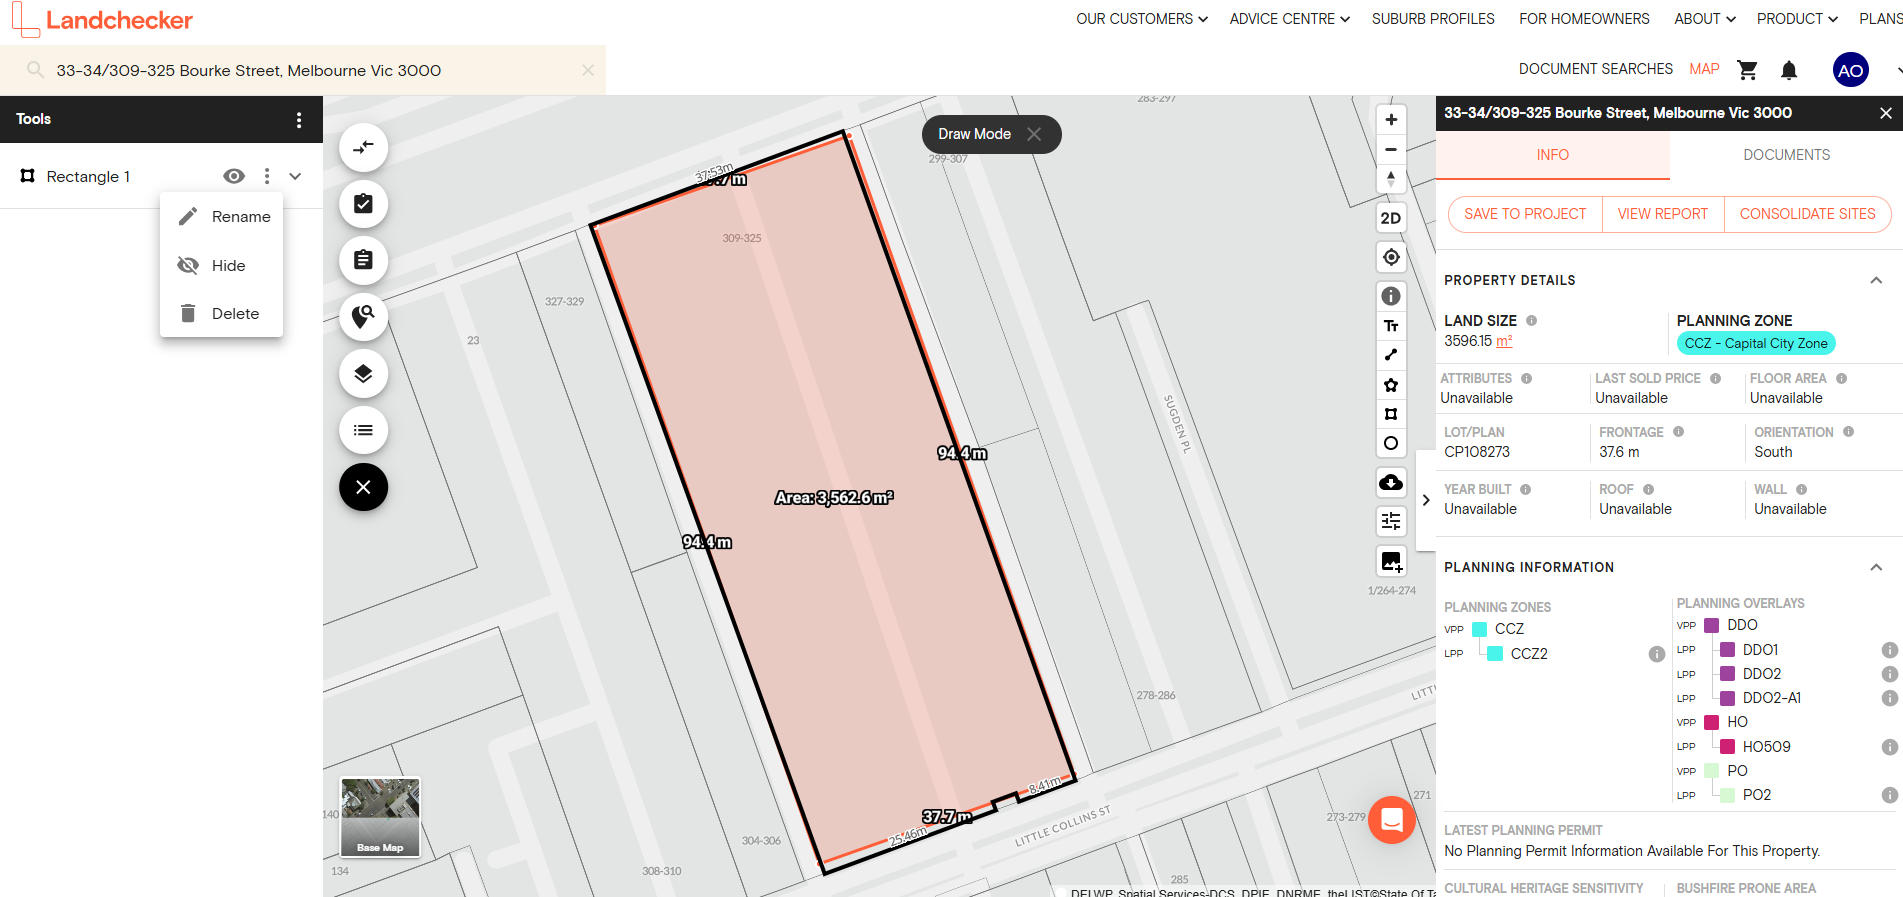
1. Click the eye icon to the right of the tool layer you want to hide. Then if you want to unhide the layer, simply click the eye icon again.
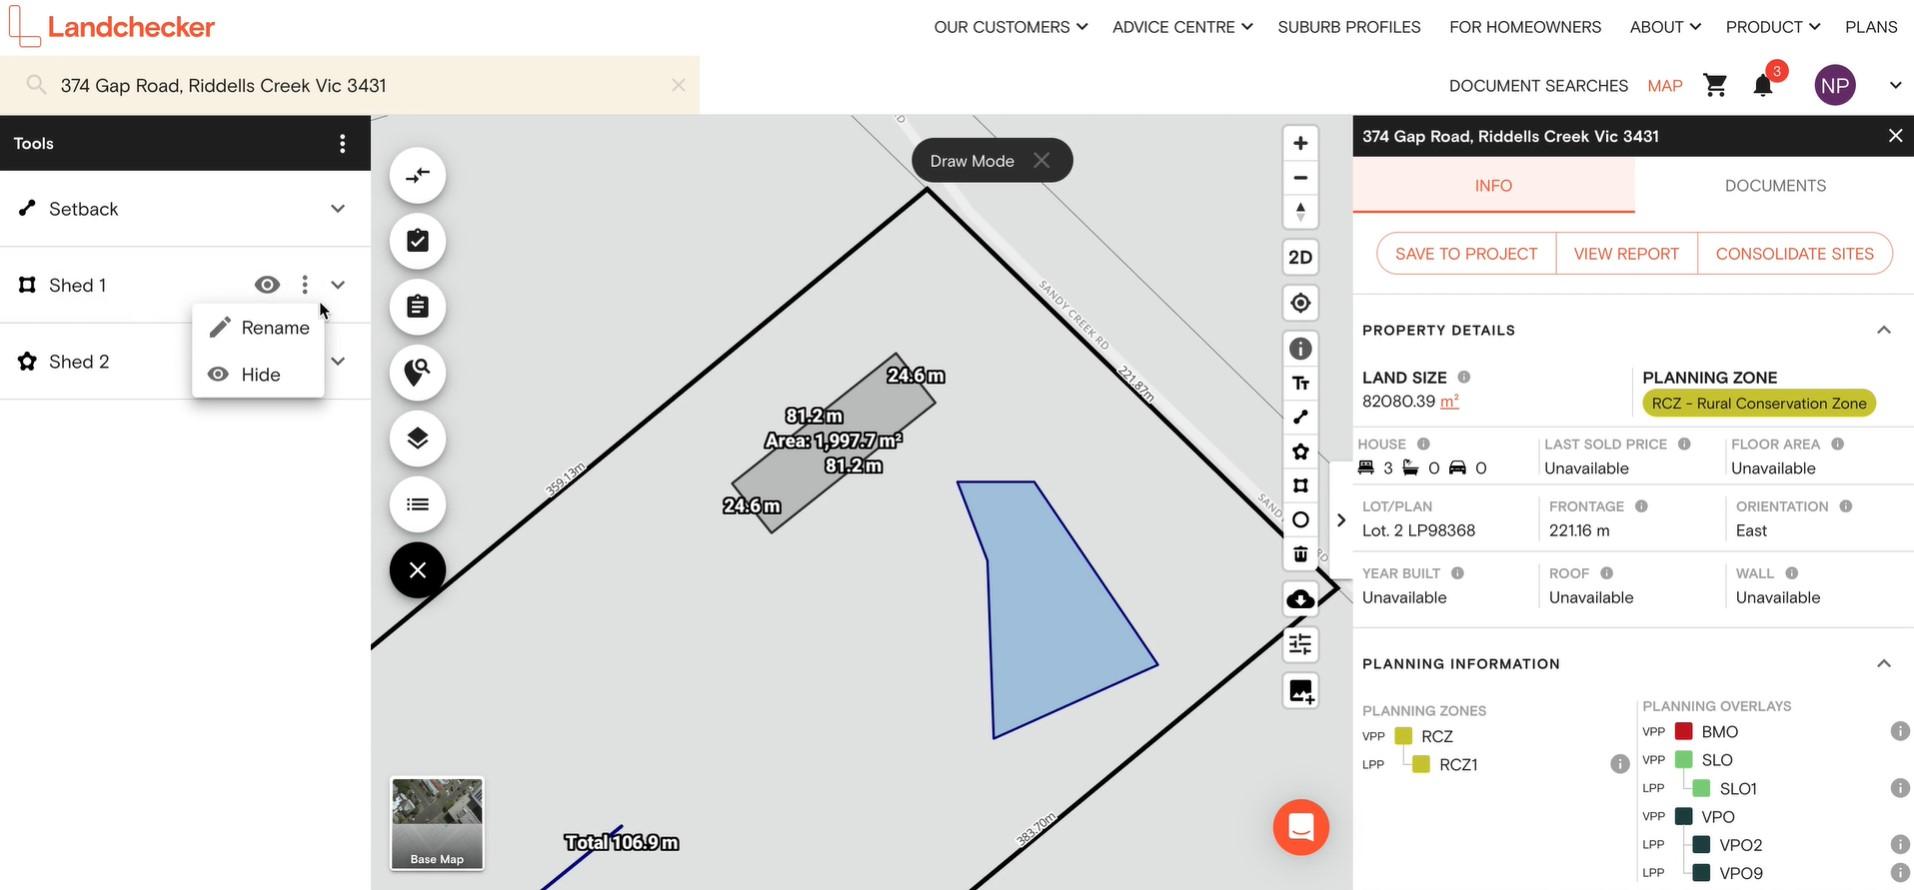
2. Another option is to hover over the tool layer you want to hide. Click the three dots beside the eye icon and select Hide.
How to Rename Tools
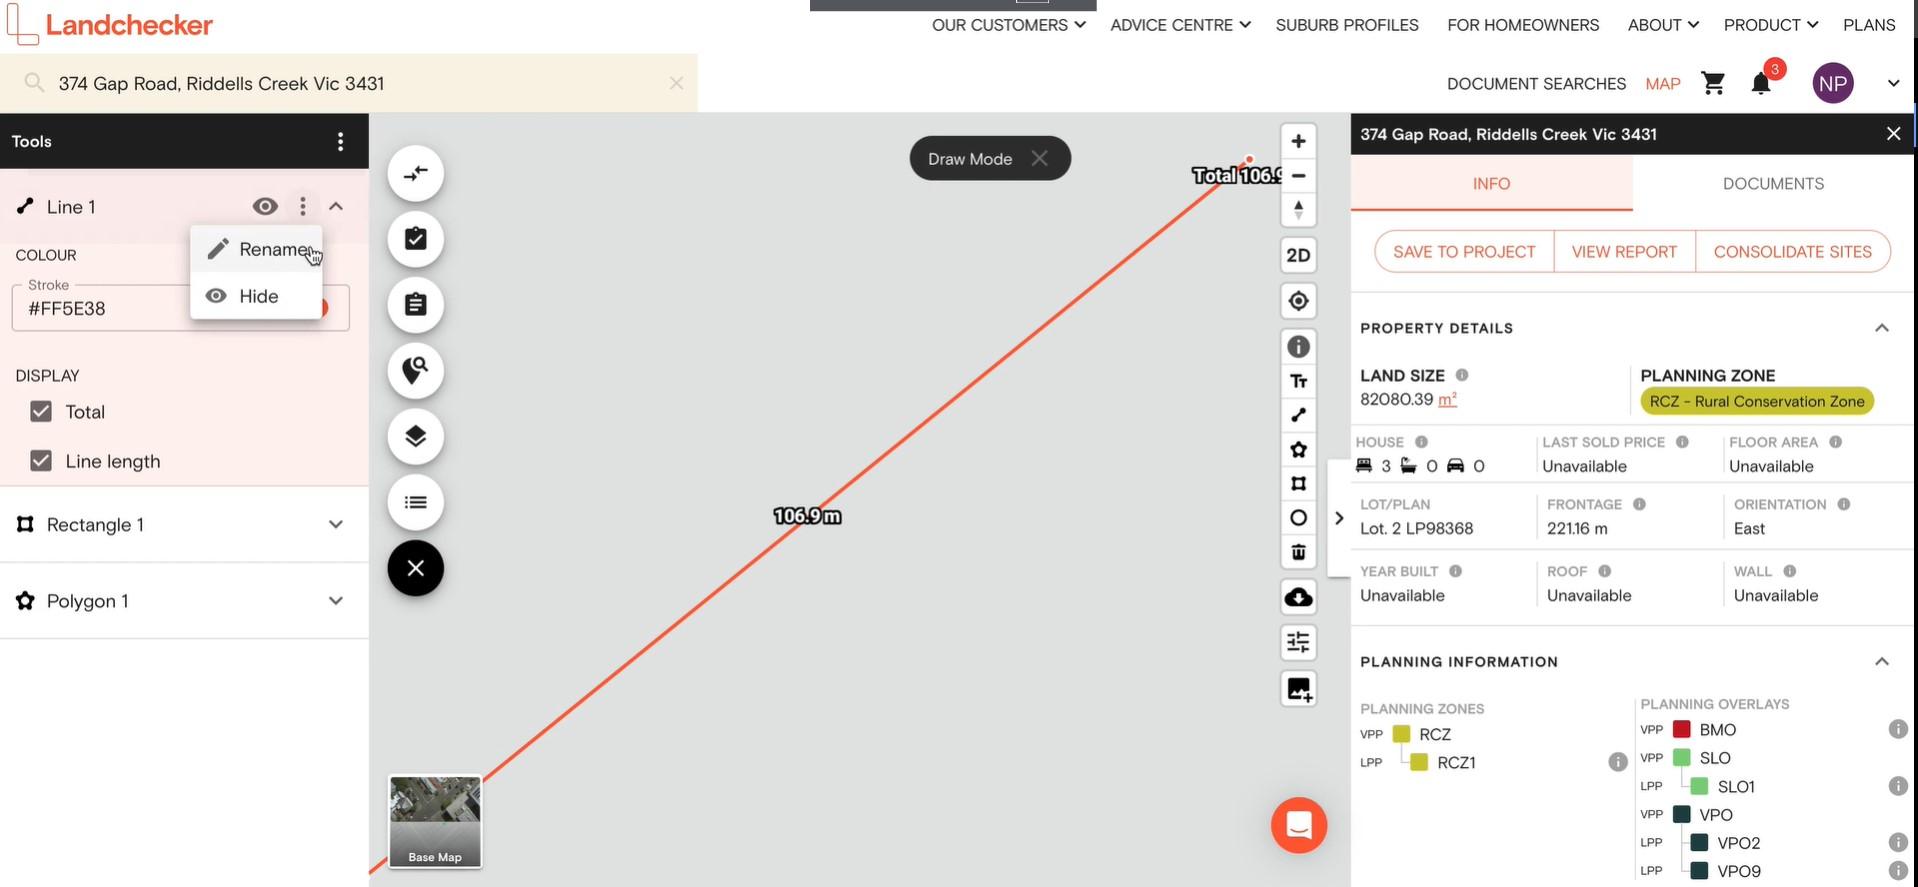
You can edit a Tool's name under the Tools panel on the left-hand side section of the map.
1. Click the three dots beside the eye icon and select Rename
2. Type the new name
3. Press Enter
How to Delete Tools
The trash icon has now been removed from the right-hand side toolbar, and you can now select 'backspace' from your keyboard when you have a tool selected.
Or, you can select 'Delete' on the left-hand side Tools panel. Simply follow the steps below.
1. Click the shape or text you want to delete
2. Click the three dots beside the eye icon
3. Select Delete from the drop-down menu to remove a shape or text
How to Reorder Tools
Sort your tools the way you want. Simply drag and drop to reorder shapes, lines and text labels in the left-hand side Tools panel.
You can place the most important shape, line or text label on top, arrange them alphabetically or sort them based on the property address where each tool is located.
Here’s a quick demo video on how to reorder tools.
How to Remove the Bounding Box and Change Unit Measurements via Tools Settings
After drawing a polygon, rectangle, line or circle on the map, you will see a light border around it. To remove the bounding box, simply follow the steps below.
1. Click the three dots on the top right corner of the Tools panel and select Settings
2. In the Tools Settings section, tick off the checkbox beside ‘Show bounding box’ to remove it
3. Click the checkbox again to unhide the bounding box
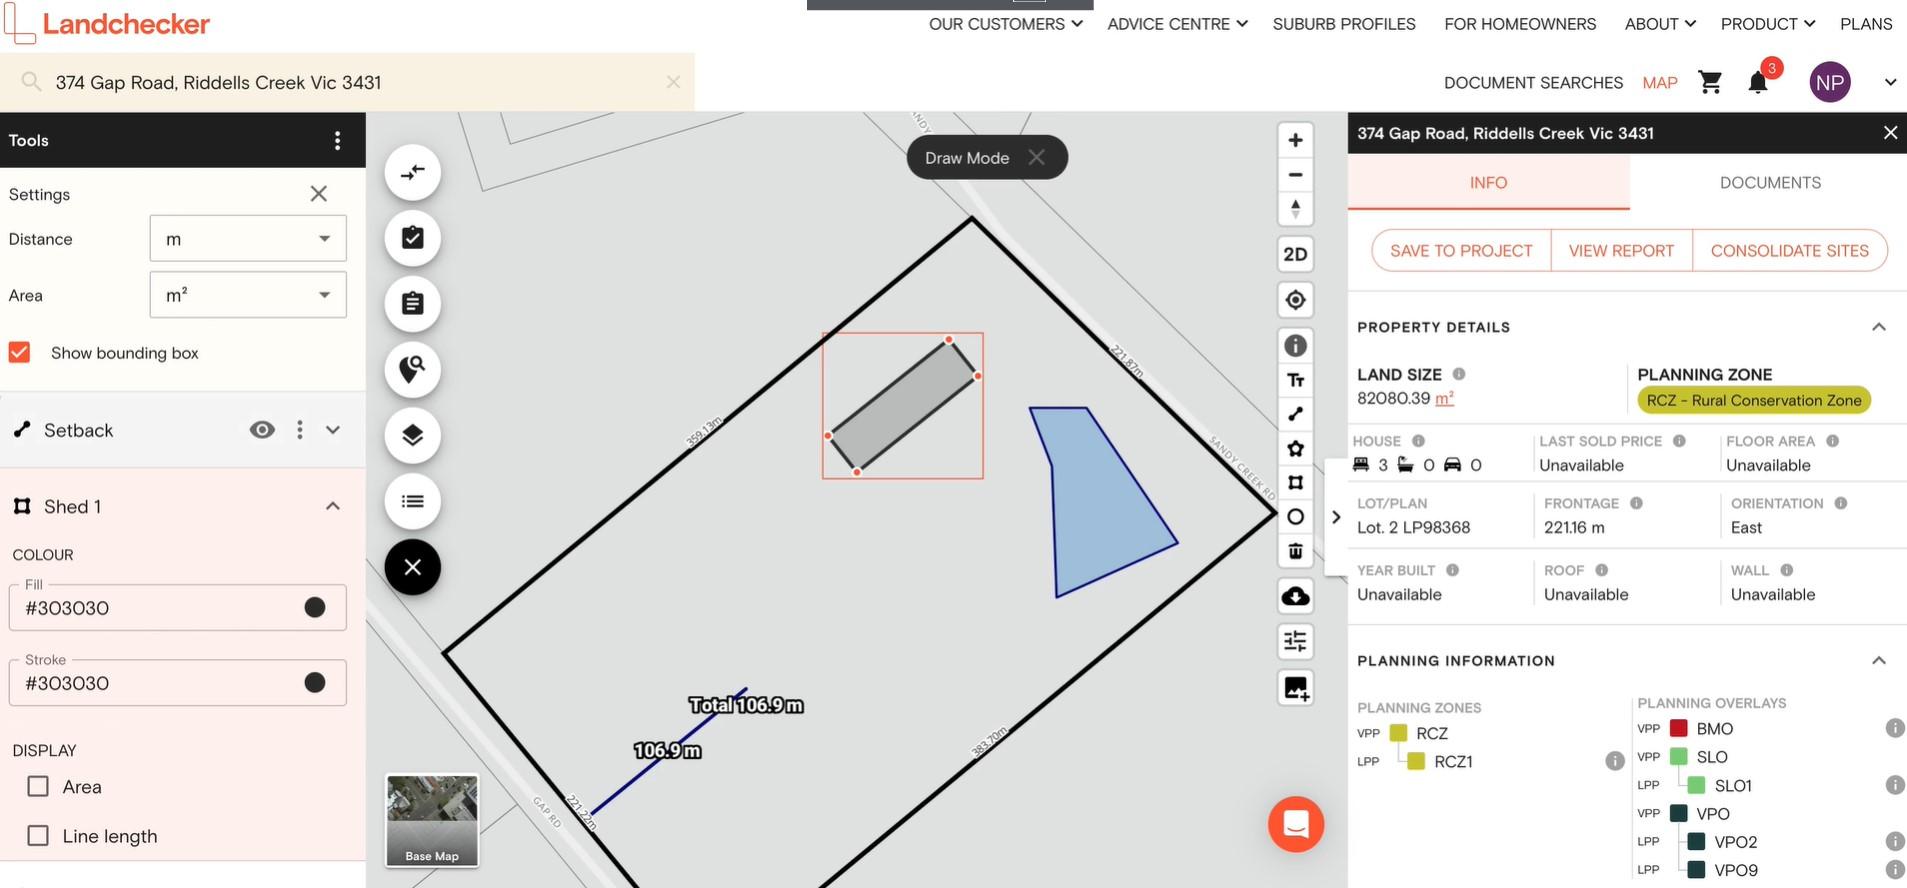
You can also set a different distance and area measurement under Tools Settings. For Distance, you can select either of the following:
Metre (m)
Kilometre (km)
Feet (ft)
Yard (yd)
Miles (mi)
Nano Miles (nmi)
For area, you can choose either of the below units of measurement:
Metre (m²)
Kilometre (km²)
Feet (ft²)
Yard (yd²)
Miles (mi²)
Acre
Hectare
Get a Sneak Peek at the New Features Coming Soon at Landchecker
We're currently upgrading the tools on the right-hand side panel to give you a better experience measuring and annotating properties, creating site plans and so much more!
Here’s a sneak peek into what our team is working on.
Rename Tools On the Map
Duplicate Tools
Group Tools
Bulk Select Tools
Save Tools to Library
Save Tools to Projects
Import and Export GeoJSON
Add Map Pins
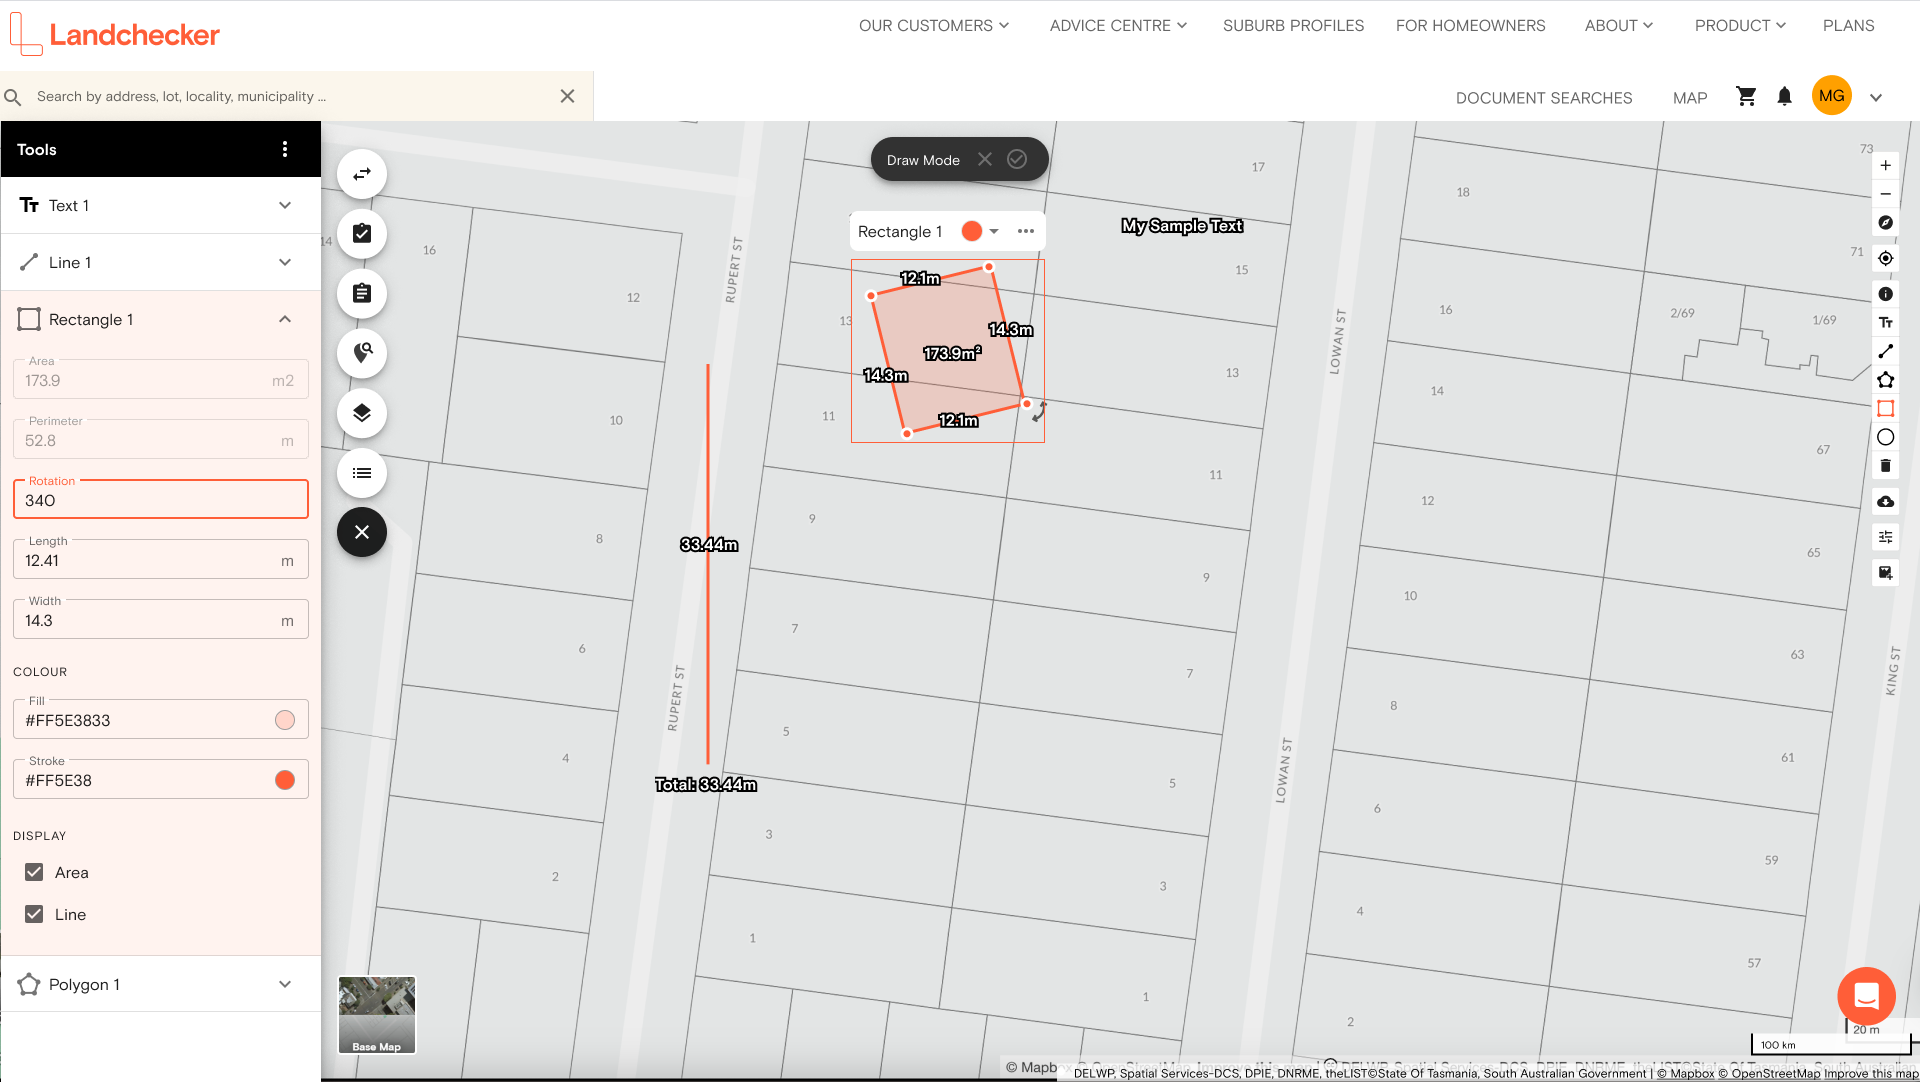
Edit Size, Rotation, Bearing and Length
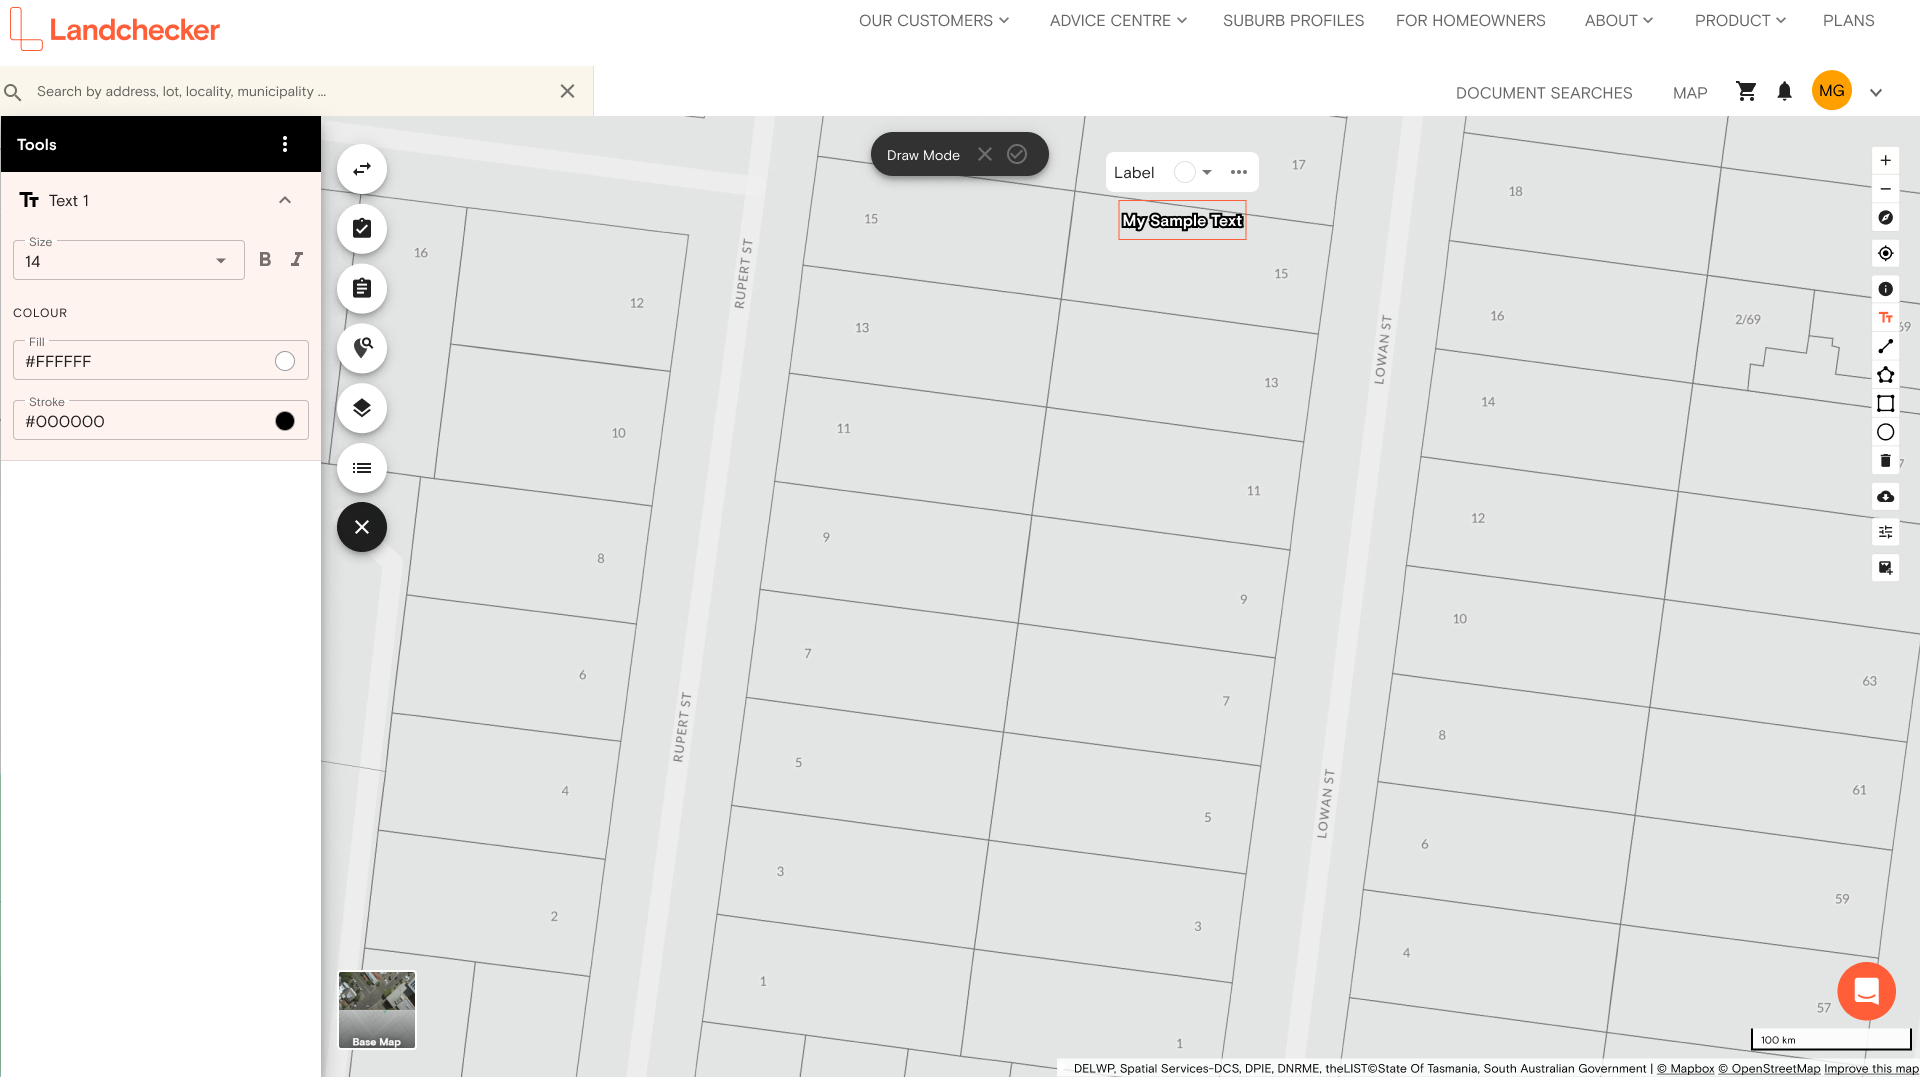
Edit Text Size, Italics and Bold
Watch this space for more updates to this section.
