Product Help
How to add notes to a project property
Projects in Landchecker offer a range of functionalities to help you organise properties, manage workflows, and collaborate with your team. One of the key features is the ability to add notes.
Notes make it easy to record updates, share insights, or keep track of important details for each project property. You can add notes either from the Project dashboard or directly from the map view.
Add Notes from the Map
Best for adding notes to a specific property within a project.
1. Click the Projects icon on the left-hand side menu.
2. Select a project from the list.
3. Choose a property saved in that project to open the right-hand side property panel.
4. Select the Notes tab, type your note, and click Add.
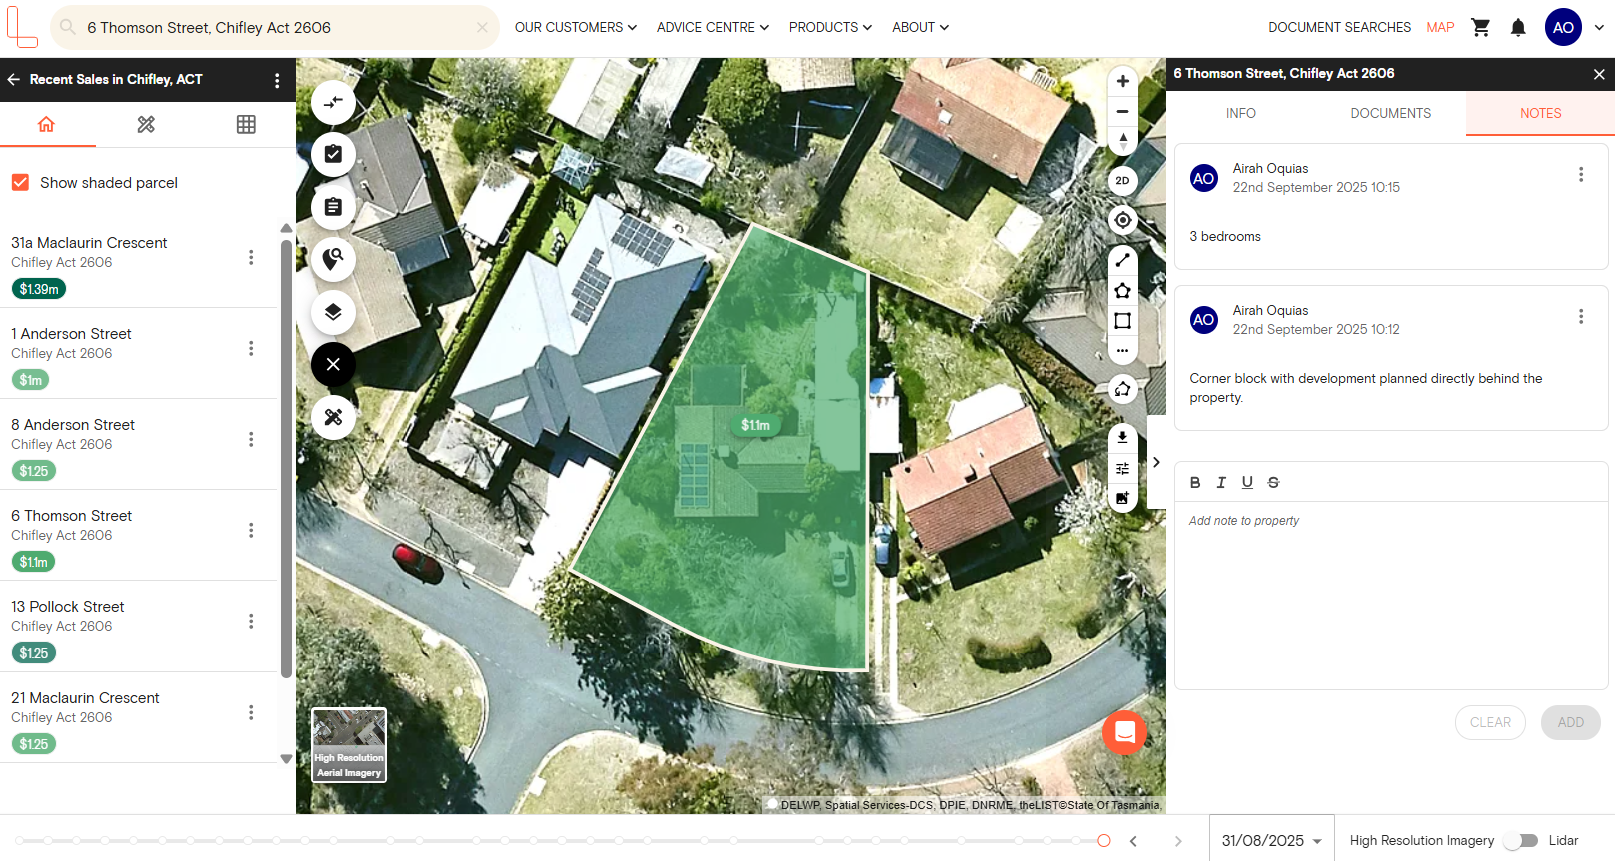
5. To remove a note, click the three-dot menu next to the note and select Delete.
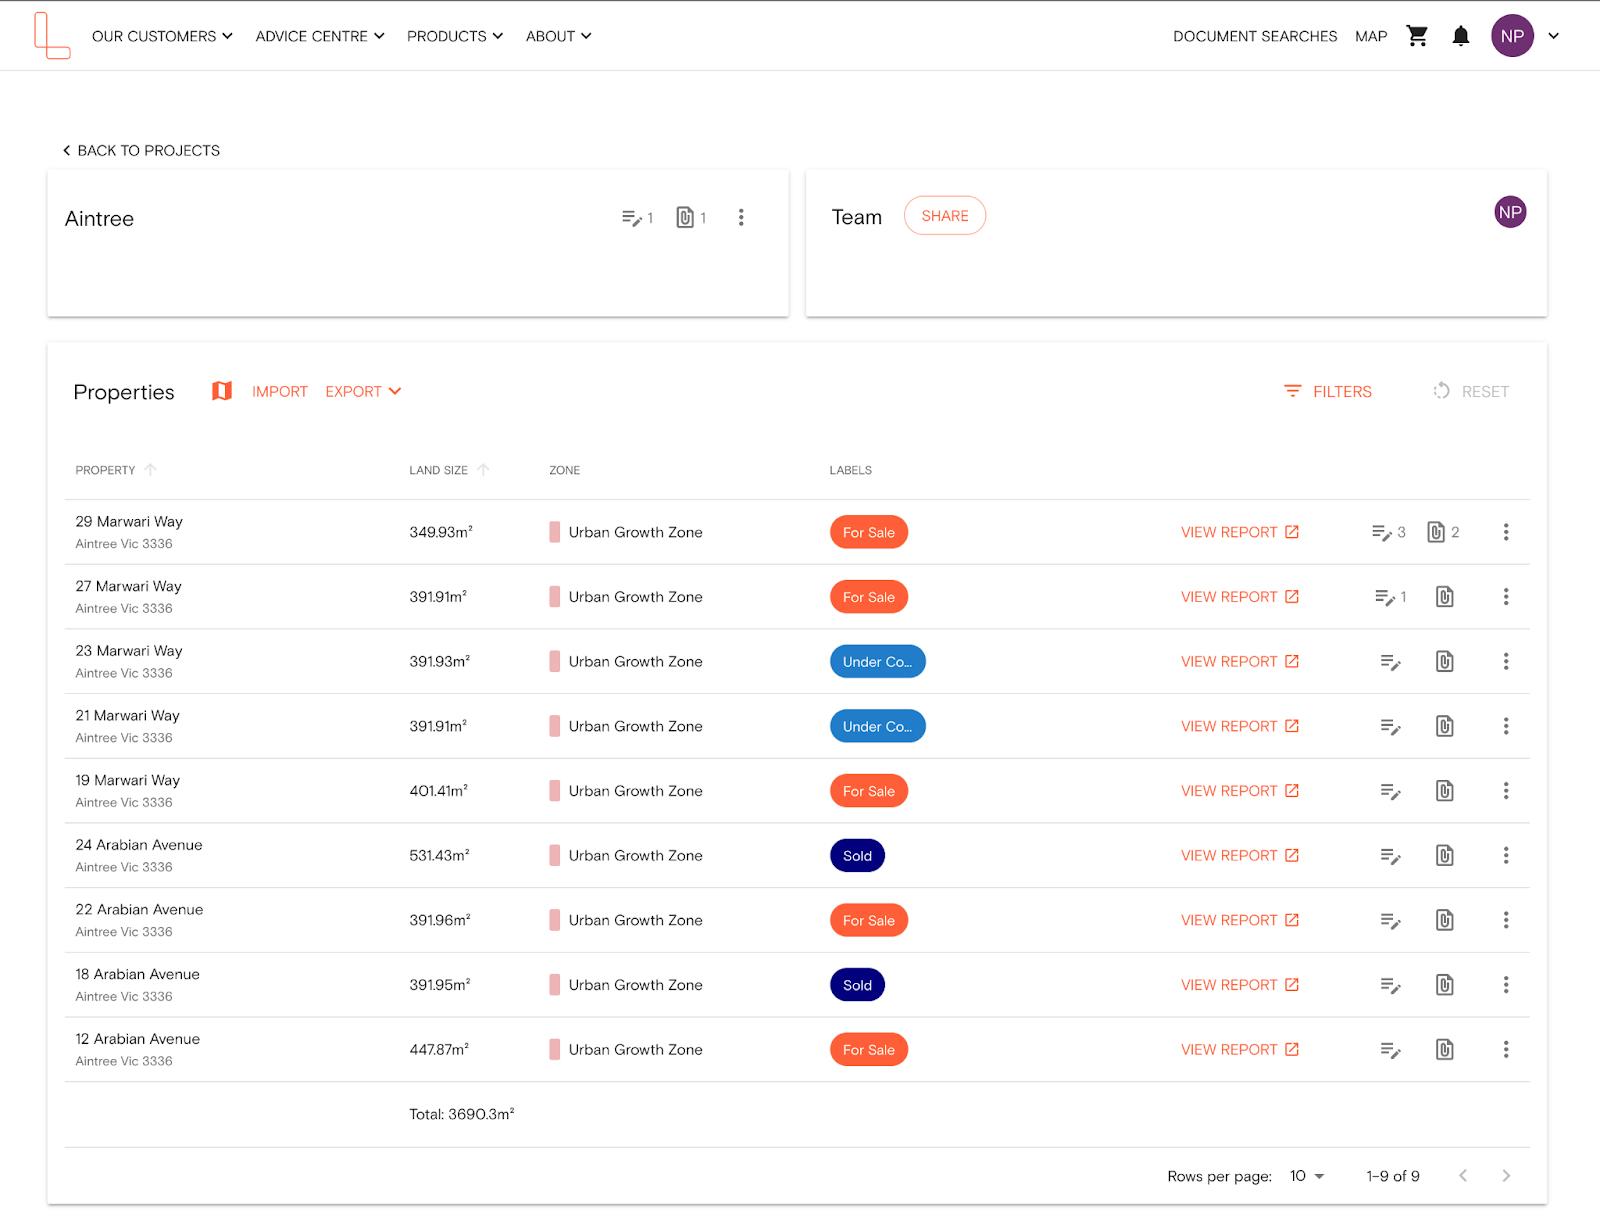
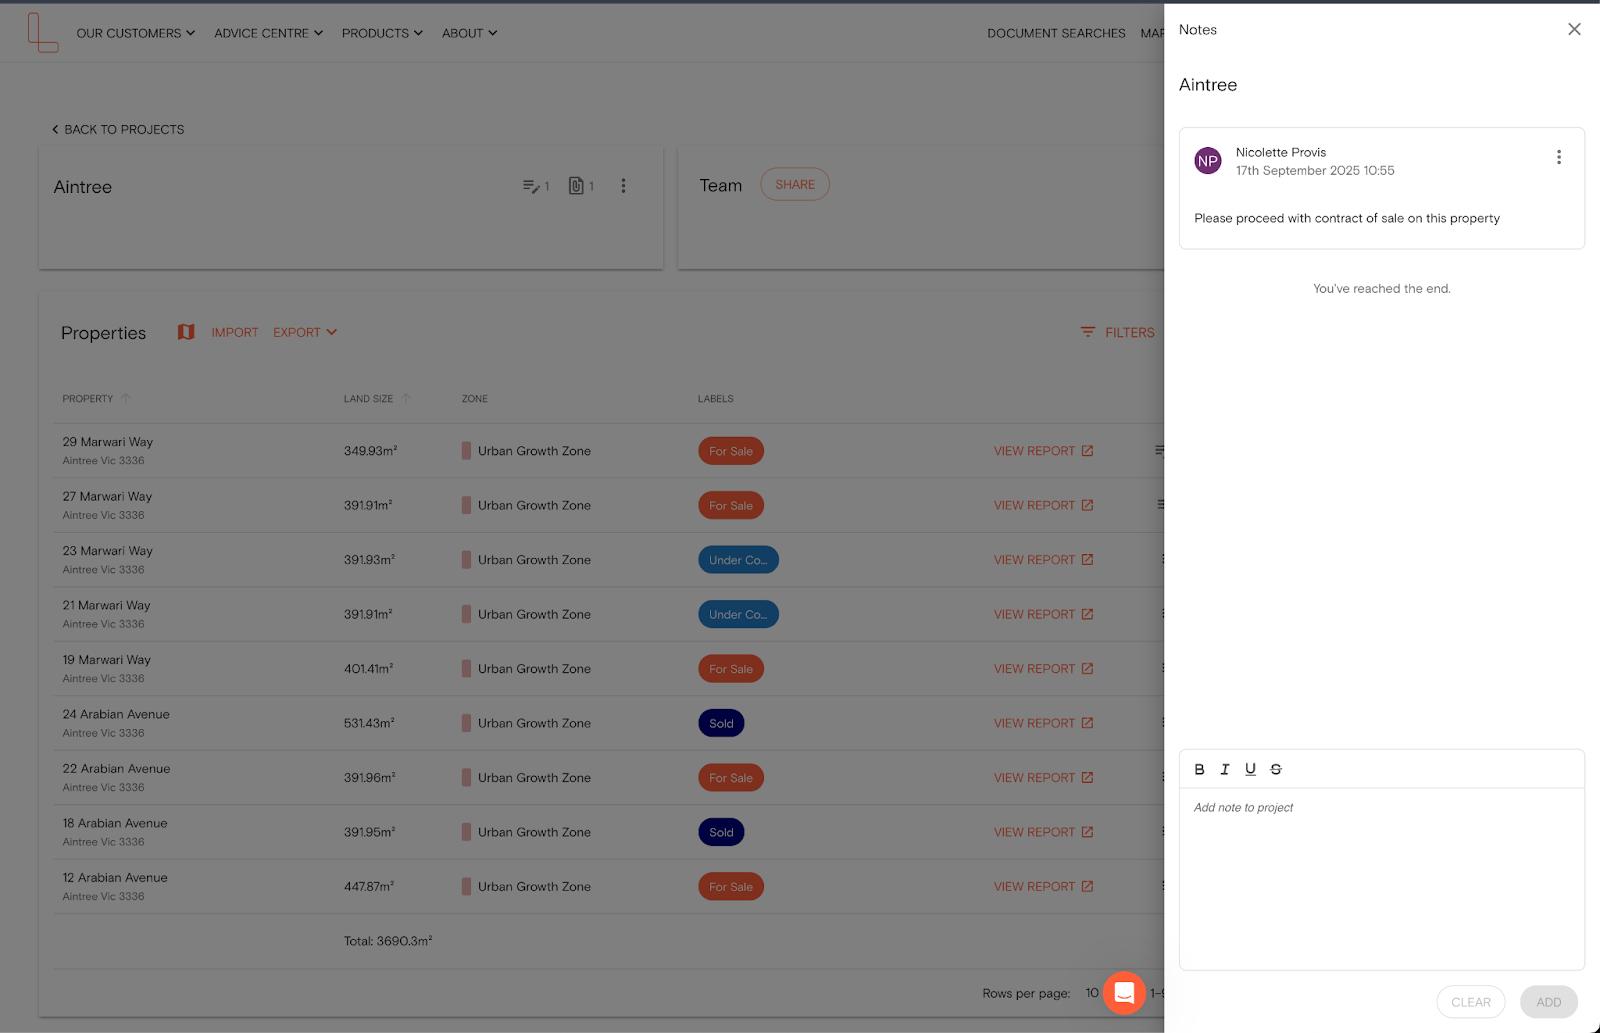
Add Notes from the Projects Dashboard
1. Access your projects by clicking on your profile (in the navigation bar) and selecting Projects in the drop-down options.
2. Click on the project name; the project details will open up on the next page.
3. If you want to add notes to a property, click the notes icon in the properties section beside the view report button.
If you want to add notes to your project, click the notes icon next to the project name in the top left corner.
4. Type your note in the text field and click Add.
Notes are displayed in chronological order, with the most recent at the top. You can add and delete notes anytime, ensuring your project information stays current and organised.
You can also export notes into Excel. The export from the Projects dashboard includes all properties, their information, and the latest three notes for each property.