Product Help
How to save shapes, measurements and markups to a project
Save your completed shapes, measurements, pin markers and text annotations to a specific project so you can organise your work in one convenient location.
Using this feature makes it easier to collaborate with your team, and you can edit your markups within projects. Follow the steps below to get started.
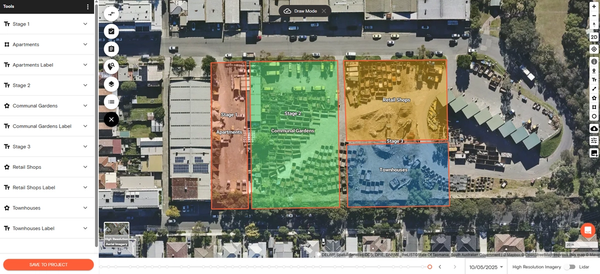
1. To save markups or annotations to a project, click the three-dot button in the tools panel and select bulk selection. Check the box next to the items you want to save.
You can also group selected markups into a single folder to keep them organised before saving.
Once ready, click the Save to Project button found at the bottom of the tools library.
2. A pop-up box will appear where you can either save the markups to an existing project or create a new one.
To save to an existing project, click the dropdown and select the project from the list.
To create a new project, select +Create New Project, enter a project name, and then click Submit.
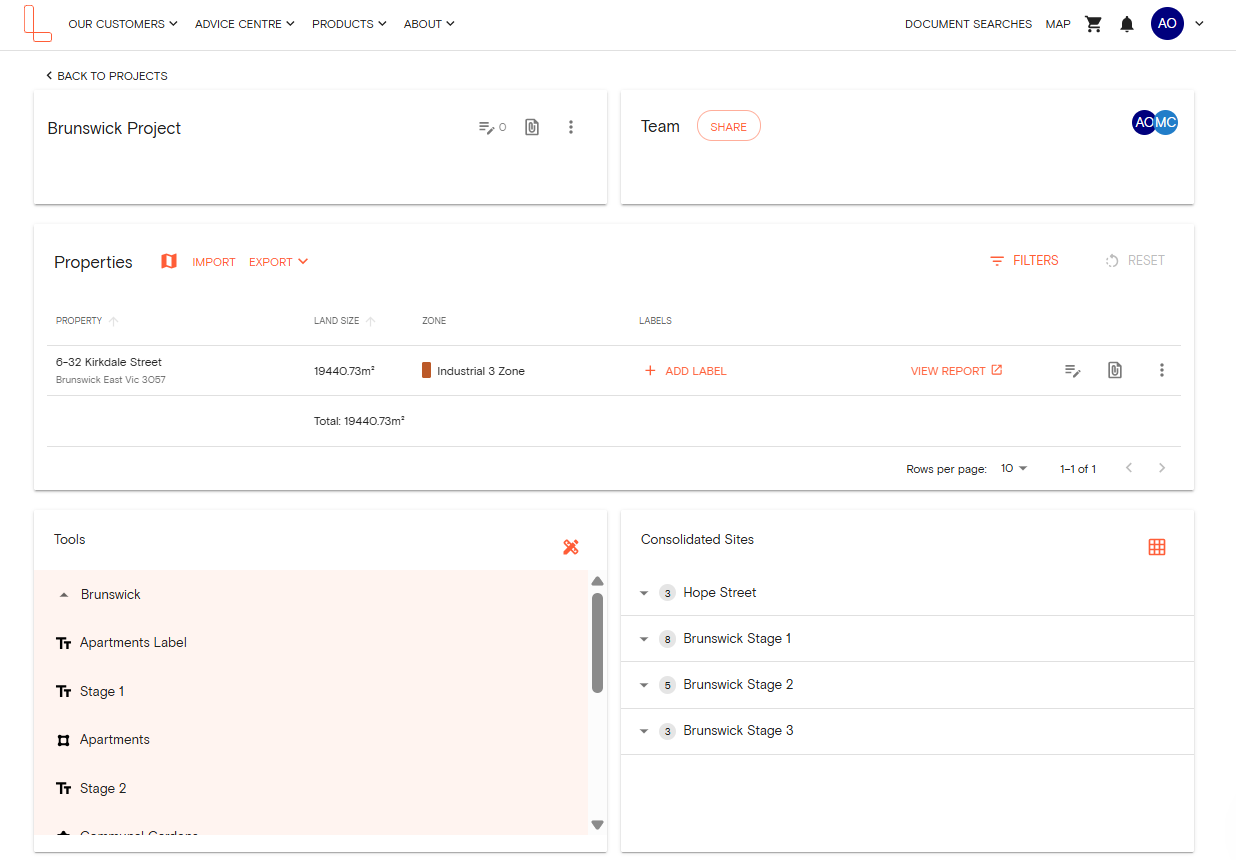
3. After saving the items, you can view them on the left-hand side Projects section or in the Projects dashboard.
How to View Tools in the Projects Dashboard
1. Go to your profile in the navigation bar and select Projects from the drop-down list.
2. Click the project name to open and view its details.
3. Scroll down to view the shapes, markups and annotations saved in your specific project.
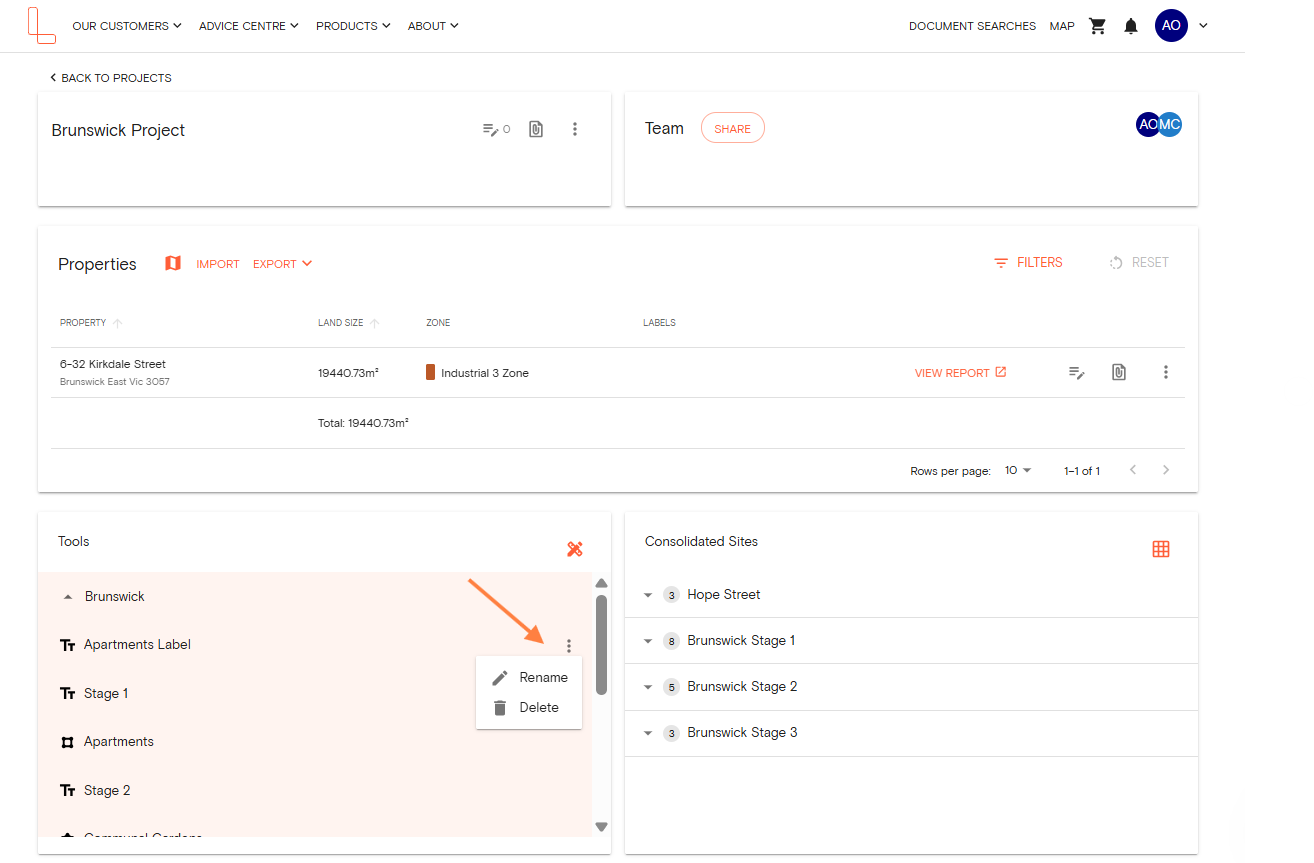
You can also hover over a specific markup and click the three-dot button to Rename or Delete an item.
Related Help Articles:
How to group and ungroup tools
How to measure area and perimeter
How to measure length using the Distance Tool
How to add text labels on the map